Introduction to XenServer Fuel Plugin
Mirantis Fuel, which is a member of the OpenStack Big Tent has already made itself one of the leading installers for OpenStack and offers an pluggable architecture that enable you to add new capabilities to your environments. XenServer Fuel Plugin is aiming to enables use of the XenServer open source hypervisor (versions greater than 6.5 SP1) as a Compute provider with Mirantis OpenStack, in a commercially supportable way. To be more specific we want to achieve the following major goals:
- Add customisation to the user interface
- Configuring OpenStack to use XenServer at install-time
- Install required plugins and other pre-requisites
- Routing control networks to give access to dom0
- Update the XenServer OpenStack integration
- Replacing the test image
Customising the user interface
Mirantis Fuel is highly GUI-based. As a single web page application written in JavaScript, user can easily choose OpenStack release, hypervisor type, network or storage back-ends and extra OpenStack services like Murano or Sahara through a wizard. More detailed specific settings can be configured in a list of categorised settings tabs. You can even drag and drop the network interfaces. Generally, in Fuel UI configuration has been redesigned to make it really user-friendly.
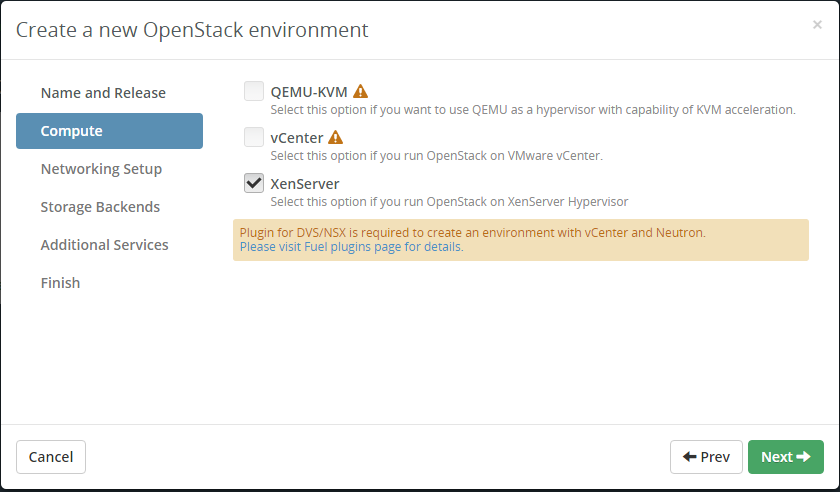
Moreover, Mirantis Fuel even provides a control plane to let you customise the UI. As long as you follow the schema like [openstack.yaml] (https://github.com/openstack/fuel-web/blob/master/nailgun/nailgun/fixtures/openstack.yaml), user can define their own OpenStack release. In Mirantis 8.0, user can even define their own resource type with [components.yaml] (https://wiki.openstack.org/wiki/Fuel/Plugins#Component_compatibility_registry). In above screen shot, a hypervisor type “XenServer” is defined. And if you choose it, the subsequent wizard and setting tabs will represent based on your choice and the incompatible list described in components.yaml. This feature is really useful because OpenStack setup is complicated and there are many restrictions. With incompatible list, users will be prevented from making wrong choices.
In addition to provide restriction, Mirantis also provide a way to add input to web UI. In environment_config.yaml we define text fields to ask for XenServer credential information because we need to ssh into XenServer hosts to apply patches later on which will be presented to the user in the web UI.
Configuring use of XenServer
For now in Mirantis Fuel there are only three built-in hypervisor types which
are QEMU, KVM and VMWare: XenServer isn’t included by default. Our solution will
perform the deployment with qemu as the hypervisor and configure to use
XenServer when all prerequisites have been settled down. Changing the hypervisor
type is quite straightforward, the below settings are added to
/etc/nova/nova-compute.conf and the Nova services restarted.
[DEFAULT]
compute_driver=xenapi.XenAPIDriver
[xenserver]
connection_url=http://169.254.0.1
connection_username="root"
connection_password="XENSERVER_PASSWORD"
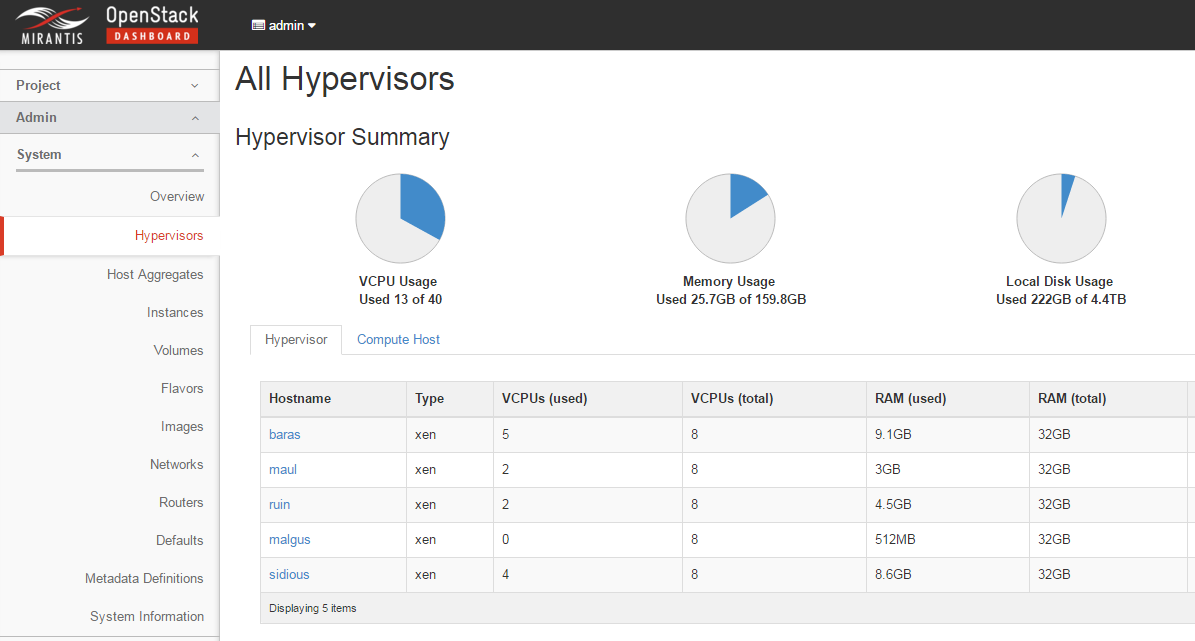
But the timing to do the change might be tricky. Fortunately Mirantis Fuel provides a flexible hook mechanism based on Puppet task dependencies. Once it is done, the new hypervisor type will reflect in Horizon like below.
Install required plugins
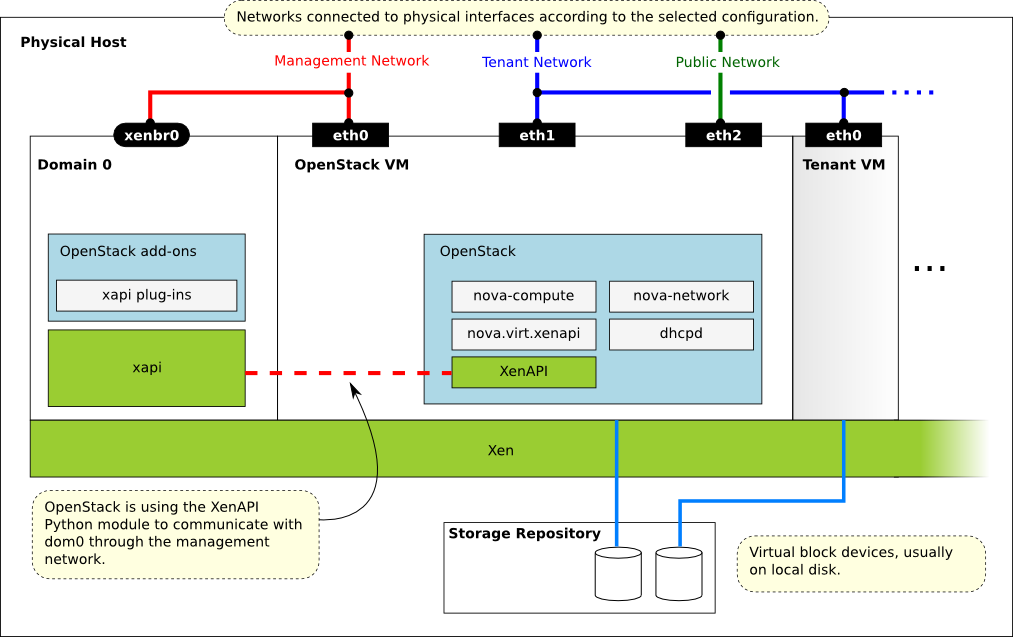
However changing the hypervisor type is just the first step. The communication between XAPI and Nova services need to be set up like shown in the below diagram. So we need to install some plugins.
Usually the best way to apply patches to XenServer hosts, or more precisely, Dom0, is to pack the changed files into a XenServer supplemental pack and call xe CLI to install it.
xe-install-supplemental-pack /tmp/novaplugins-liberty.iso
Still, it’s important that the different components are installed in the correct order. The major steps can be install-pv-tool, install-dpkg-dependencies and install-sup-pack. So the task dependencies look like this:
- id: 'install-pv-tool'
  role: ['compute']
  required_for: ['compute-post-deployment']
  requires: ['post_deployment_start']
- id: 'install-dpkg-dependencies'
  role: ['compute']
  required_for: ['compute-post-deployment']
  requires: ['post_deployment_start']
- id: 'install-sup-pack'
  role: ['compute']
  required_for: ['post_deployment_end']
  requires: ['install-pv-tool', 'install-dpkg-dependencies']
More information about Fuel’s hook mechanism can be found in deployment_tasks.yaml.
Re-routing control networks
In XenServer, Host Internal Management Network (aka. HIMN) is a special internal network which is used for communication between the Compute VM and the Dom0 that it is running on. The HIMN has the following characteristics:
- It is a built-in network isolated from others.
- It is invisible in XenCenter, as it should not normally need to be modified.
- It presents is DHCP service on the network, with a fixed dom0 IP address of
169.254.0.1.
The HIMN is ideal for internal use and you don’t have to spend effort on setting up one. More importantly, Dom0 need to have access to OpenStack control networks as well as Compute nodes do. If we forward control packets via HIMN, that will be easier than setting up additional interfaces for Dom0. And in a sense, Dom0 and Compute node can be regarded as one entity.
In order to make full use of the HIMN, and ensure that dom0 can access the management networks set up by Mirantis Openstack, we need to configure the Compute VM to masquerade packets from dom0 using NAT techniques. Here is the code. We create iptable rules in Compute nodes:
sed -i s/#net.ipv4.ip_forward/net.ipv4.ip_forward/g /etc/sysctl.conf
sysctl -p /etc/sysctl.conf
iptables -t nat -A POSTROUTING -o br-storage -j MASQUERADE
iptables -A FORWARD -i br-storage -o eth3 -m state --state RELATED,ESTABLISHED -j ACCEPT
iptables -A FORWARD -i eth3 -o br-storage -j ACCEPT
iptables -t nat -A POSTROUTING -o br-mgmt -j MASQUERADE
iptables -A FORWARD -i br-mgmt -o eth3 -m state --state RELATED,ESTABLISHED -j ACCEPT
iptables -A FORWARD -i eth3 -o br-mgmt -j ACCEPT
br-storage and br-mgmt refer to OpenStack Storage network and Management
networks. They are the OpenStack control networks we talk about. Then we change
the default gateway in Dom0 for these two subnets:
route add -net <mgmt_ip> netmask <mgmt_mask> gw <himn_ip>
route add -net <storage_ip> netmask <mgmt_mask> gw <himn_ip>
Updating the OpenStack integration
This plugin is also be used to deliver bug fixes and new features, which are being developed against OpenStack’s trunk but are of significant importance to a Mirantis 8.0 OpenStack deployment, which is based on a stable branch of OpenStack:
- Neutron plugins : Neutron support for XenServer was introduced into upstream in Mitaka, cannot reflect in Mirantis Fuel 8 which uses Liberty.
- NoVNC proxy configuration : The XenServer VNC server runs on Dom0 but Mirantis Fuel assumes, by default, that it runs in Compute node.
- Guest console logs : Enabling serial consoles from guests requires a script to control disk usage and ensure the logs do not take unbounded space.
- Config drive configuration : Config drive should be set to the default option for file injection rather than libguestfs which is default for other QEMU-based hypervisors.
- Validation for hotfix : XenServer supplemental pack XS65ESP1013 needs to be installed otherwise Virtual Block Device (VBD) connections could be mapped incorrectly.
Replacing the test image
The default test image “TestVM” is a qemu-specific cirros so need to be replaced with one compatible with XenServer.
Please be noted that Fuel Health check, which will be covered in the next chapter, always picks up the test image “TestVM” as the name is hard-coded.
wget http://ca.downloads.xensource.com/OpenStack/cirros-0.3.4-x86_64-disk.vhd.tgz
glance image-create --name "TestVM" \
  --container-format ovf --disk-format vhd \
  --property vm_mode="xen" --visibility public \
  --file "cirros-0.3.4-x86_64-disk.vhd.tgz"
In the latest XenServer Fuel plugin 3.1 (corresponding to MOS 8.0), the TestVM image has been embedded in the plugin in case the deployment has no internet connection.
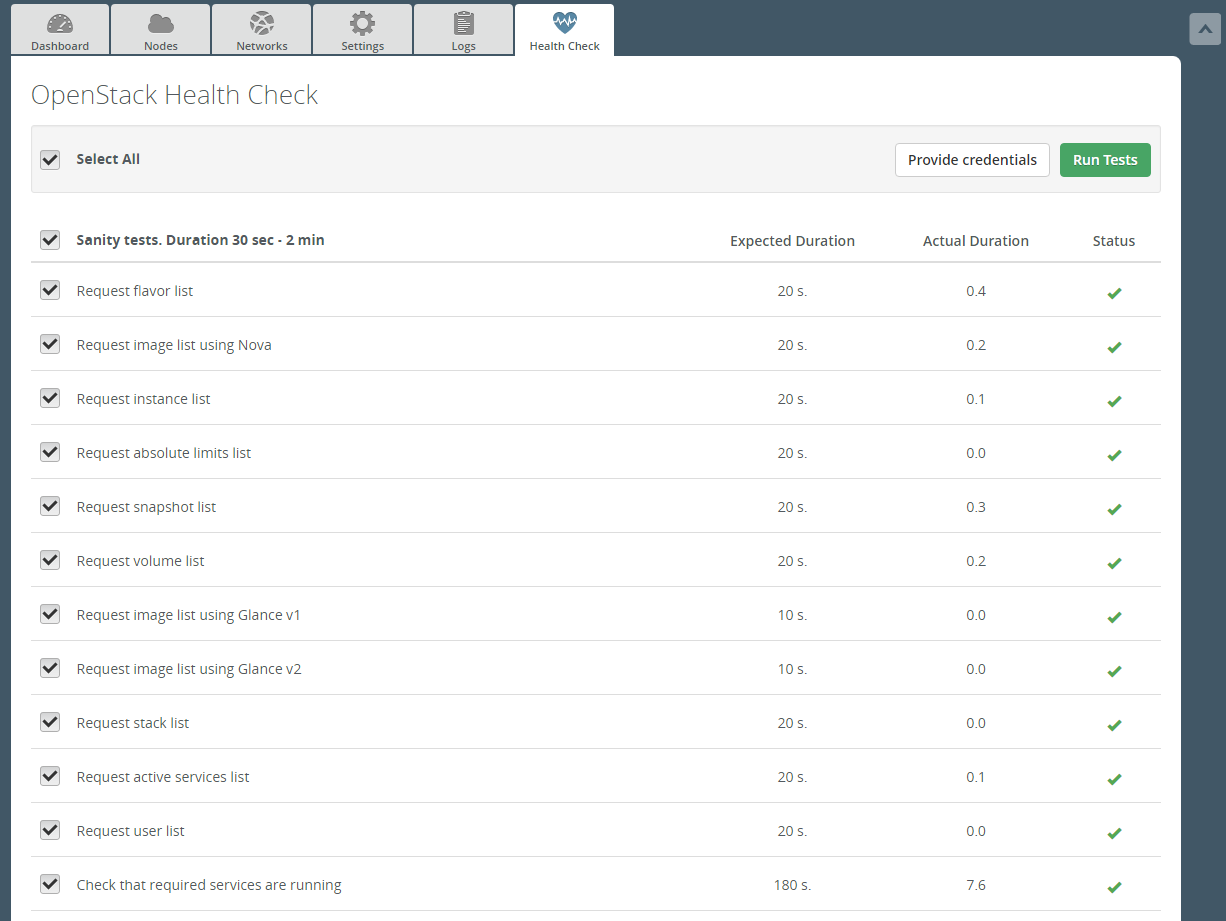
Health check
Fuel Health Check, or OpenStack Testing Framework (OSTF), is one of greatest advantages of Fuel. Fuel Health Check will go through the following categories of automated tests, and take usually 20-40 minutes to estimate the availability of a deployed environment.
Sanity tests
Functional tests
HA tests
Platform services functional tests
Cloud validation tests
Configuration tests
If everything goes right, you will get a result report like below:
Where to download
XenServer Fuel plugin has been validated since Fuel 6.1 and listed in the Fuel plugin Catalog. This is also where is most recommended to download it.
And the XenCenter HIMN plugin repo can be found under the GitHub account of Citrix OpenStack.
Source code for the above plugins are available at git.openstack.org and github.com respectively.